


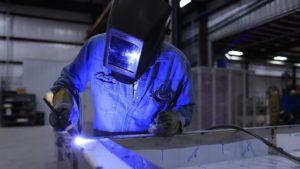
Now, imagine you’re in a busy shop, sparks flying everywhere, and you complete a weld that is strong, smooth, and perfect, with no bubbles and no cracks. That is the beauty of gas arc welding when it is done correctly. Manufacturing engineers adjusting production lines, shop floor employees producing parts, and welding students wanting to master their trade will find that these gas arc welding basics will enhance their welding professionalism. Gas arc welding creates a protective barrier to air while welding, which is essential to avoid the creation of bonds that will weld metal together. Are you ready to learn the tricks of the trade gas arc welding shields? We will go step by step and by tomorrow you will be a gas arc welding pro.
Projects are meant to be perfect, but air leaks happen, and that can destroy an otherwise solid outcome. With that in mind, let’s get to the goodies.
Why is gas arc welding revolutionary?
- The Concept: An arc is created by electrifying the wire electrode and the metal piece you are welding together. Protective gas is fed in to keep the weld void of oxygen and contaminants that are harmful to the weld.
- The Common Alias: Most people call it MIG welding and that is very appropriate since the wire electrode is fed mechanically, allowing you to focus on your welding and not on reloading the welding machine.
- Best Applications: Constructing steel frames in factories, aluminium repair on trucks, and stainless steel setups in food production plants. It is beginner-friendly and pro welding gas arc welding it is perfect.
Kit Must-Haves
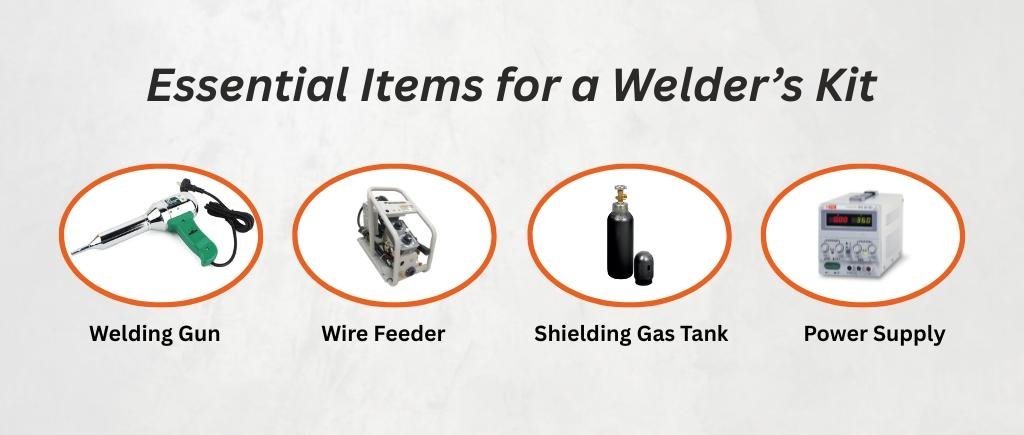
- Welding Gun: A clogging arc, gas, and wire gun that closes the tip. A daily wipe is recommended.
- Wire Feeder: Controls the rate at which wire feeds as it melts into the joints. Pro tip: Use 0.035-inch wire if the mild steel is under 1/4 ” thick.
- Shielding gas tank: Pure Argon gas is great for non-ferrous, though for steel, toss in some CO2 to be frugal and get better penetration. 18 SCFH is your aim
- Power Supply: Controls voltage (18-24V) and wire speed. Always test on junk metal first, and make sure to listen to a smooth sizzle.
Lean it out: 5 Steps to Spot-On Welds
- Always clean before starting: Welds do not increment, if they are on dirt, paint, or oil
- Adjust the gas: 15-25 CFH is recommended; adjust the gas
- Wire stick out: 1/2 to 3/8 is the optimal average. A weaker arc is caused if that distance is too long. A short distance causes erosion, and burns the tip.
- Gun Angle Trick: 0-15° push for flat beads, 10-20° drag for deeper puddles. Observe the molten puddle roll back evenly.
- Cool and inspect: 1-2 seconds post-pull with gas on. Hammer test: Solid ring? Victory!
Dodge These Traps—Real Fixes That Work
- Holey Welds (Porosity): Messy bubbles arise from drafts or low gas. Solution: Tape shut gaps where wind drafts, work inside, increase gas flow.
- Spitty Mess: Voltage too high or excessive wire speed. Reduce by 2 volts and slow the wire, watch the spatter disappear.
- Meltdown: Insufficient amps on thin material. Drop the power and weave side-to-side like you’re stitching.
- Stutter Starts: Bad ground or dusty contacts. Clean the clamp, and tighten the fittings—arc ignites like lightning.
Weld smart, stay safe.
- Gear Checklist: Dark welding helmet (shade 10 or above), flame jacket, leather gloves, and boots, no sneaks!
- Fume Fighters: Work upwind, use exhaust fans. Sunglasses for post-weld flash burn.
- Spark Patrol: Wet floors? No. An extinguisher and fire blanket are nearby.
- Daily Habit: Inspect your hoses for cracks. Gas leaks and risks boom.
Level Up Your Shop Game Today
Gas arc welding is more efficient, with every bead bringing you pride and factoring in fewer do-overs and faster jobs. Your turn to shine as factories reduce costs by 20-30% with gas arc welding.
Want electrodes that pair perfectly? Connect with top Welding Electrode making machine Manufacturers and get the Shielding Plan for unmatched protection.


Pingback: reglan medication
Pingback: tetracyklina
Pingback: antibiotics
Pingback: lasix medication
Pingback: voriconazole powder himedia
Pingback: cialis muscle cramps
Pingback: stendra price
Pingback: semaglutida para bajar de peso en mexico precio
Pingback: flagyl for diarrhea in humans
Pingback: ketoconazole full information